Introduction
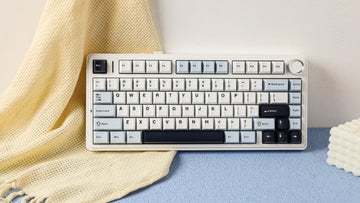
Today we are going to be going over the steps required to swap your case on your Epomaker keyboard. In this case, we will be swapping the Aluminum GK68XS in Silver with the Acrylic GK68XS. We will also include a video at the end so you can watch the process from the beginning to the end.
You can get the keyboards mentioned here:
Keyboard: https://epomaker.com/products/epomaker-gk68xs
Acrylic Case: https://epomaker.com/collections/keyboards/products/gk68-case
Disclaimer: When working with lithium batteries, please make sure to use the proper precautions. Do not use sharp objects near the battery, distort it by pulling it out, or using excess heat. This process will void your Epomaker warranty. Please approach the process with caution.
What you need:
- Screw driver set - like this one from iFixit.
- Glue replacement to stop the battery from moving around.
- Keycap and Switch puller if you have those on your keyboard.
Step-by-Step guide:
Step One: Removing the Keycaps and Switches

You can skip this if you are using the kit version of our keyboards. We will first remove the keycaps using a wire keycap puller. Most of our Epomaker keyboards that are hot swappable come both with a keycap and switch remover.
When your switch and keycaps are removed, you will have accessibility to the plate and the screws. I do not suggest trying to unscrew the plate with the switches still inserted. You can easily bend the pins of the switches or remove the hot swappable pads making the socket not work anymore.
Step Two: Unscrewing the GK68XS Plate
There are [X] screws on the GK68XS. You will need to use a screwdriver set to access the PCB and battery. Remove these screws, but make sure that you are cautious as there will be a cable connecting the Battery to the PCB if your keyboard is wireless. You also need to make sure that you are not lifting straight upward as this case has a cutout for the USB. If you lift it too hard, you will also snap off the USB-C connector.
Step Three: Remove the PCB and the Plate
As mentioned above, please make sure to lift it slowly. This is the part where most people break their keyboard when modding. Again, breaking the keyboard at this stage is not covered by warranty. Take out the PCB in which you disconnected the battery. Until all you have is the Battery with the wire and the case.
Step Four: Place PCB and plate into new case

After removing it from the previous aluminium case, you can place it into the new acrylic case you are going to be using. You have to make sure your plate is the FR4 version of the plate to make sure it is compatible with the bold acrylic case. Please make sure to avoid hitting the USB-C connector when placing the components inside.
Step Five: Place PCB and plate into new case
Install the screws into the PCB, and make sure that you note where the smaller screws go and the larger ones in the case. If you get it in the wrong hole, you can always remove it with the screwdriver and shift it to the right place. Your case is now ready to install switches and keycaps.
If you still have any questions, feel free to comment below:)
With tremendous love,
Epomaker Team